When it comes to enhancing the durability and aesthetic appeal of your tile surfaces, you may find that utilizing Dr Fixit Epoxy Tile Grout proves to be a valuable asset. The application of this grout involves a series of precise steps that can significantly elevate the outcome of your tiling project. By understanding the key aspects of surface preparation, mixing techniques, application methods, and finishing touches, you can ensure a seamless and long-lasting finish. The intricacies of using Dr Fixit Epoxy Tile Grout hold the potential to transform your tiling endeavors, making each step a crucial component in achieving a professional result.
Surface Preparation
- Before applying Dr Fixit Epoxy Tile Grout, thoroughly cleaning and degreasing the surface is essential to ensure proper adhesion and long-lasting results. Start by removing any existing grout, dirt, and grease from the tile joints. Ensure the surface is dry and free of any contaminants that may hinder the grout’s ability to bond effectively.
- When it comes to grout application techniques, follow the manufacturer’s instructions meticulously. Mix the epoxy grout components according to the specified ratio and apply it evenly into the tile joints using a rubber float. Work in small sections to prevent the grout from hardening before you can finish. After applying the grout, use a damp sponge to remove excess grout from the tile surfaces while ensuring the joints are adequately filled.
- Dr Fixit Epoxy Tile Grout offers a variety of color options to suit your design preferences. Choose a color that complements your tiles and enhances the overall aesthetic of the space. Ensure consistency in mixing and application to achieve a professional finish.
Mixing the Epoxy Grout
Considering the importance of achieving a well-mixed epoxy grout, what key steps should be followed to ensure optimal results?
- To begin, it’s crucial to measure the epoxy resin and hardener accurately following the manufacturer’s instructions. This precise measurement will influence the grout’s consistency. Once measured, combine the resin and hardener in a clean container. Use a drill with a mixing paddle attachment to blend the components thoroughly. Ensure that the mixing is done at a slow speed to prevent air entrapment.
- When mixing the epoxy grout, pay close attention to achieving a uniform color and texture throughout the mixture. Inadequate mixing can lead to inconsistencies in the grout, affecting its performance. Aim for a smooth and homogeneous blend to guarantee optimal results.
- Moreover, when applying the epoxy grout, utilize suitable application techniques such as using a rubber float to push the grout into the joints firmly. Work in small sections to prevent the grout from hardening before completion. By maintaining the right grout consistency and employing proper application methods, you can achieve a professional finish for your tiling project.
Applying the Grout
- To ensure a successful application of the epoxy grout, maintain a consistent and uniform mixture achieved through accurate measuring and thorough blending of the epoxy resin and hardener. When applying Dr Fixit Epoxy Tile Grout, it’s crucial to use proper grout application techniques and best practices.
- Start by spreading the mixed grout over the tile surface at a 45-degree angle using a rubber float, ensuring all joints are filled completely. After about 20-30 minutes, begin cleaning the excess grout off the tiles using a damp sponge at a 45-degree angle to prevent removing too much grout from the joints. Once the grout has set for the specified time, typically 24 hours, buff the tiles with a dry cloth to remove any haze.
- In case of any troubleshooting grout application issues such as uneven grout lines or air bubbles, carefully scrape out the affected areas and reapply the epoxy grout following the correct procedures to achieve a flawless finish.
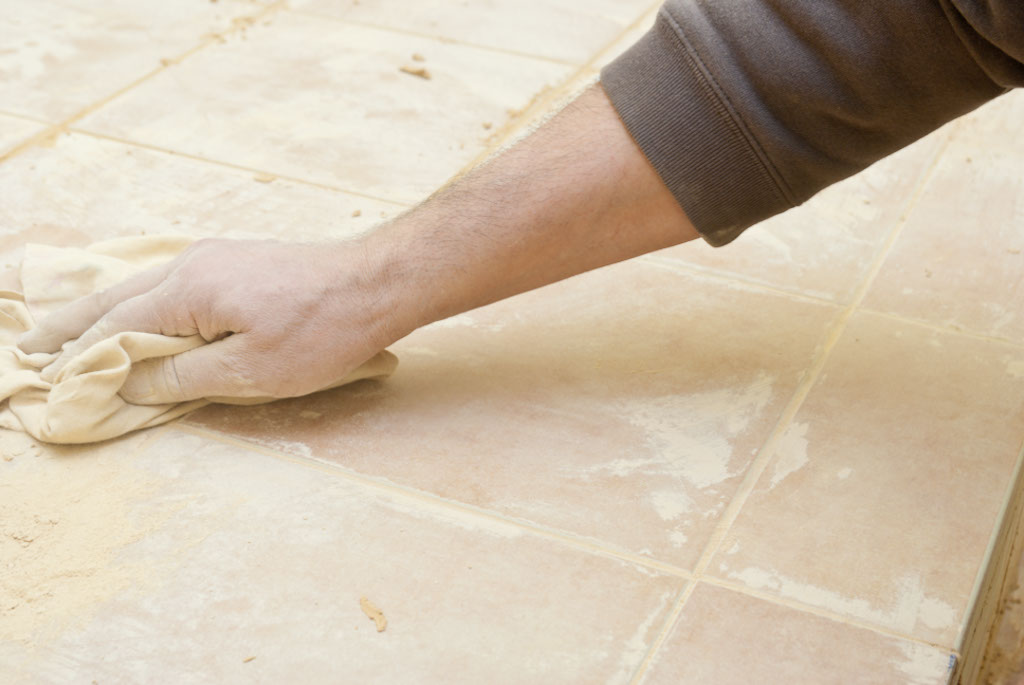
Cleaning Excess Grout
- When cleaning excess grout after applying Dr Fixit Epoxy Tile Grout, ensure thorough removal of any residue to achieve a polished finish on the tiles.
- To effectively remove residue, start by wiping the tiles gently with a damp sponge within 30 minutes of applying the grout. Be cautious not to disturb the grout lines while cleaning.
- Next, use a clean, damp cloth to wipe the tiles again, ensuring all excess grout is removed. For stubborn residue, a solution of water and white vinegar can be gently applied to the affected areas with a soft-bristle brush.
- Rinse the tiles thoroughly with clean water after removing all residue to prevent any leftover grout from hardening on the surface.
- Regular maintenance tips include cleaning the tiles with a mild detergent and water solution to preserve the grout’s integrity and keep the tiles looking fresh. Remember to follow these steps diligently to achieve a professional and flawless tile finish.
Final Finishing
- After thoroughly cleaning excess grout from your tiles, the final finishing step involves applying a protective sealant to enhance durability and maintain the polished appearance. Grout sealing is crucial to prevent moisture penetration, staining, and mold growth. To start, ensure the grout is completely dry before applying the sealant. Use a brush or applicator to evenly spread the sealant over the grout lines. Allow the sealant to cure as per the manufacturer’s instructions.
- Grout sealing not only enhances the aesthetics of your tiles by keeping the grout lines looking fresh and clean but also plays a significant role in maintenance and durability. The sealant acts as a barrier against spills, dirt, and other contaminants, making it easier to clean and maintain your tiled surface. Additionally, it helps in preserving the grout color and prevents discoloration over time. Regularly inspect the sealed grout lines for any signs of wear and reapply the sealant as needed to ensure long-lasting protection and a beautiful finish.
Conclusion
After following the proper surface preparation steps, mixing the Dr. Fixit epoxy tile grout thoroughly, and applying it with precision, be sure to clean any excess grout before it sets. Once the grout has dried, perform a final finishing to achieve a clean and polished look. With these simple steps, you can ensure a professional and long-lasting finish for your tiled surfaces using Dr. Fixit epoxy tile grout.