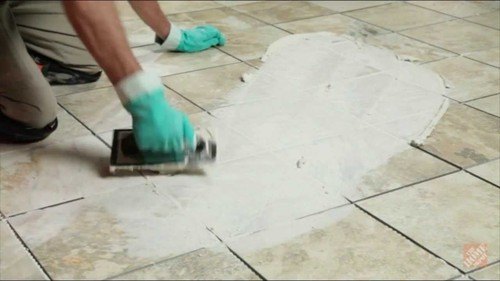
Ever found yourself pondering the age-old question of how many coats of wall putty are truly necessary for that flawless finish? Well, wonder no more, as we’re about to uncover the layers of this puzzling topic. Understanding the nuances of wall putty application can make or break your painting project, so let’s explore the nuances together to ensure your walls are picture-perfect.
Factors Influencing Number of Coats
- When determining the number of coats of wall putty required, it’s crucial to consider various factors that influence the application process. Surface preparation plays a vital role in ensuring the proper adhesion of the wall putty to the wall surface. Before applying the putty, make sure the surface is clean, dry, and free from dust, grease, or any other contaminants that could hinder the bonding process.
- Additionally, understanding the drying time of the wall putty is essential. Each coat of putty needs sufficient time to dry before applying the next coat. This ensures that the putty cures properly and results in a smooth and even finish. Factors such as temperature and humidity can affect the drying time of the putty, so it’s important to follow the manufacturer’s instructions regarding drying times between coats.

Importance of Proper Application
- Properly applying the wall putty is crucial to achieving a smooth and even finish, ensuring that all the factors influencing the number of coats work together effectively. To begin, proper preparation of the surface is essential. Make sure to clean the wall thoroughly, removing any dust, dirt, or debris that could affect the adhesion of the putty. Fill in any cracks or holes using a suitable filler before applying the putty to ensure a seamless appearance.
- When it comes to the actual application, focus on achieving a smooth and consistent layer of putty across the surface. Use a putty knife to spread the putty evenly, working in small sections to maintain control over the thickness and uniformity of the layer. Avoid leaving any bumps, ridges, or air bubbles, as these imperfections can show through the paint and mar the final look of the wall.
Recommended Number of Coats
- For optimal results, the recommended number of coats of wall putty typically ranges from two to three, depending on the surface condition and desired finish. It’s crucial to start with proper surface preparation, ensuring the wall is clean, dry, and free from dust or grease. Each coat should be applied evenly, allowing sufficient drying time between applications. The drying time can vary depending on factors like humidity and temperature, so following the manufacturer’s instructions is essential.
- When considering the coverage area, you should calculate the total square footage of the surface to determine the amount of wall putty needed. Additionally, the thickness of each coat plays a significant role in achieving a smooth and flawless finish. It’s recommended to apply thin coats to avoid cracking and ensure better adhesion to the wall surface.
Tips for Applying Wall Putty
- To ensure a smooth application and optimal results when applying wall putty, start by thoroughly mixing the product to achieve a consistent texture. Proper mixing ensures that the putty spreads evenly onto the surface, preventing clumps or uneven patches.
- Once the putty is mixed, apply it using a putty knife in smooth, even strokes. After the putty has been applied, allow it to dry completely according to the manufacturer’s instructions before proceeding with sanding. The drying time is crucial as sanding too early can ruin the finish.
- When sanding the dried putty, use a fine-grit sandpaper to smooth out any imperfections. A circular motion is recommended to achieve a seamless blend between the putty and the wall surface. After sanding, make sure to clean the area thoroughly to remove any dust or debris before proceeding with primer application.
- Applying a primer helps with paint adhesion, ensuring that the paint adheres evenly and extends the longevity of the finish. Following these tips will help you achieve a professional-looking result when applying wall putty.
Achieving a Smooth Finish
- After thoroughly mixing the wall putty for a consistent texture and applying it smoothly with a putty knife, achieving a smooth finish entails careful sanding using fine-grit sandpaper in a circular motion to blend seamlessly with the wall surface. The sanding technique is crucial for a flawless result.
- Begin by allowing the putty to dry completely; typically, this takes about 24 hours but may vary based on humidity levels and thickness applied. Once dry, gently sand the putty in a circular motion with fine-grit sandpaper. Avoid applying excessive pressure, as this can create uneven patches. The goal is to create a uniform surface that seamlessly merges with the wall. Be mindful of not over-sanding, as this can damage the putty and necessitate rework.
- After sanding, wipe the surface with a clean, damp cloth to remove any dust particles before priming or painting. This meticulous process ensures a professional, smooth finish that enhances the overall appearance of your walls.
Conclusion
In conclusion, the number of coats of wall putty required depends on factors like surface condition and desired finish. Proper application is crucial for a smooth and durable result. It’s generally recommended to apply two coats of wall putty for optimal coverage and finish. By following tips for application and ensuring even coverage, you can achieve a professional-looking result for your walls. Remember, attention to detail is key for a successful wall putty application.