When it comes to addressing the imperfections on your aging walls, selecting the most suitable putty is crucial for achieving a flawless finish. You might have found yourself pondering over the options available, wondering which one will truly stand the test of time. Whether it’s the resilience against cracks or the ease of application, the right putty can make all the difference in revitalizing your old walls.
Types of Putty for Old Walls
- When repairing old walls, selecting the right type of putty is crucial for achieving a smooth and durable finish. Two key factors to consider when choosing putty for old walls are color matching and surface preparation. Color matching is essential to ensure that the putty blends seamlessly with the existing wall paint or texture. Before purchasing putty, compare samples against the wall to find the closest match. Some putties come in a variety of colors or can be painted over, offering flexibility in achieving a perfect blend.
- Surface preparation is equally important. Old walls may have cracks, holes, or uneven surfaces that need to be addressed before applying putty. Clean the area thoroughly, removing any loose debris or old putty. Use a primer if necessary to improve adhesion and ensure a long-lasting repair.
Factors to Consider Before Choosing
- Considering the condition of old walls and the importance of color matching and surface preparation, several key factors should be carefully evaluated before selecting the best putty for your project. When dealing with old walls, proper surface preparation is crucial. Ensure the wall is clean, dry, and free of loose debris before applying any putty. This step is essential for the putty to adhere well and provide a long-lasting finish.
- Moreover, drying time is a critical factor to consider. Different putties have varying drying times, ranging from quick-drying options to ones that require more time to set. If you’re working on a time-sensitive project, opt for a putty with a quick drying time to expedite the process. However, if time isn’t a constraint, you may choose a putty that takes longer to dry but offers other benefits like enhanced durability.
Application Techniques for Best Results
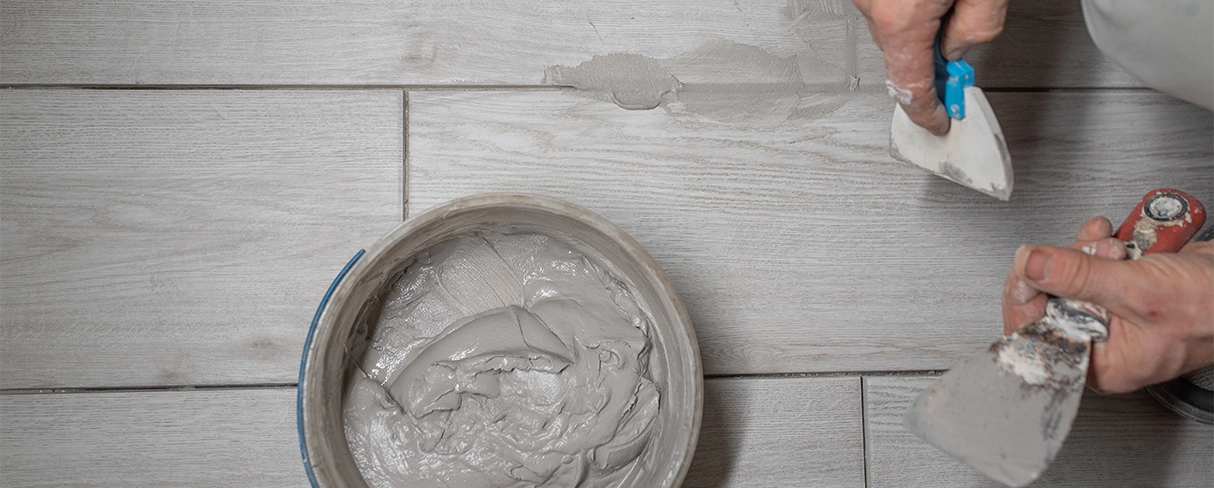
- For optimal results when applying putty to old walls, ensure that the surface is thoroughly prepped and primed to promote proper adhesion and a seamless finish. Before starting, clean the wall surface to remove any dust, dirt, or loose particles. Fill in any large cracks or holes with a suitable filler and allow it to dry completely. Once the surface is prepped, apply the putty using a putty knife in smooth, even strokes. Make sure to press the putty firmly into any crevices or imperfections for a uniform surface.
- When applying the putty, pay attention to achieving a smooth application by spreading it evenly across the wall. Avoid leaving any bumps or ridges that could affect the final finish. After applying the putty, allow ample time for it to dry completely according to the manufacturer’s instructions. Rushing this step can result in cracking or an uneven surface once painted. By following these steps and ensuring proper drying time, you can achieve a professional-looking finish on your old walls.
Comparing Durability and Longevity
- To assess the effectiveness of different putty options for old walls, it’s crucial to evaluate their durability and longevity in maintaining a seamless and professional finish over time. When comparing putties for old walls, consider the strength comparison between products.
- Opt for putties that offer high tensile strength, as they’re less likely to crack or crumble over time, ensuring a long-lasting repair. Look for putties that have been specifically formulated for aging resistance. These putties are designed to withstand the natural wear and tear that comes with time, ensuring that your walls remain smooth and flawless for years to come.
- Durability is key when choosing a putty for old walls. Select a putty that can withstand temperature changes and moisture fluctuations without compromising its integrity. Additionally, look for putties that have been tested for longevity, ensuring that your repair work will stand the test of time. By prioritizing strength and aging resistance, you can ensure that your old walls receive the care they need to look their best for years to come.
Cost-Effective Options for Wall Repair
- When looking for cost-effective options for wall repair, prioritize products that offer both quality and affordability, ensuring a successful outcome without breaking the bank. For budget-friendly solutions, consider using alternative materials like spackling paste or joint compound, which can be more economical than traditional putty. These options are versatile and can effectively fill in cracks, holes, and imperfections on old walls.
- Engaging in DIY hacks can also be a great way to save money on wall repairs. Simple techniques like using toothpaste to fill small nail holes or creating your own putty mixture using flour and glue can be quick fixes that cost next to nothing. These methods are suitable for minor touch-ups and can be a fun and creative way to address small blemishes on your walls without spending a lot of money.
Conclusion
In conclusion, when choosing putty for old walls, it’s important to consider factors such as the type of wall material, the extent of damage, and the desired longevity of the repair. Opting for a high-quality, durable putty that’s specifically designed for old walls can ensure a successful and long-lasting repair. By carefully selecting the right product and applying it with proper techniques, you can restore the beauty and integrity of your walls effectively and cost-efficiently.