When applying tile grout, ensuring proper coverage and a clean finish is crucial for a polished look.
Imagine you’ve just completed tiling a stunning backsplash in your kitchen, but the grout application process seems daunting. Understanding the right techniques and tools to use can make a significant difference in the final outcome of your project. As you begin to navigate through the steps of applying tile grout, each stage plays a vital role in achieving that professional finish you desire. Let’s break down the key steps and essential tips for a successful grouting experience.
Necessary Tools and Materials
- To begin applying tile grout effectively, gather the necessary tools and materials for the job. Start by ensuring you have the correct grout for your tiles, whether sanded or unsanded. You’ll need a grout float for application and a grout sponge for cleanup. Having a bucket for mixing the grout, a margin trowel for achieving the right mixing consistency, and some clean water are essential.
- When preparing the grout, aim for a peanut butter-like consistency; this will help in achieving a smooth application. Begin by mixing the grout according to the manufacturer’s instructions. Use the margin trowel to blend the grout thoroughly until it’s uniform and free of lumps.
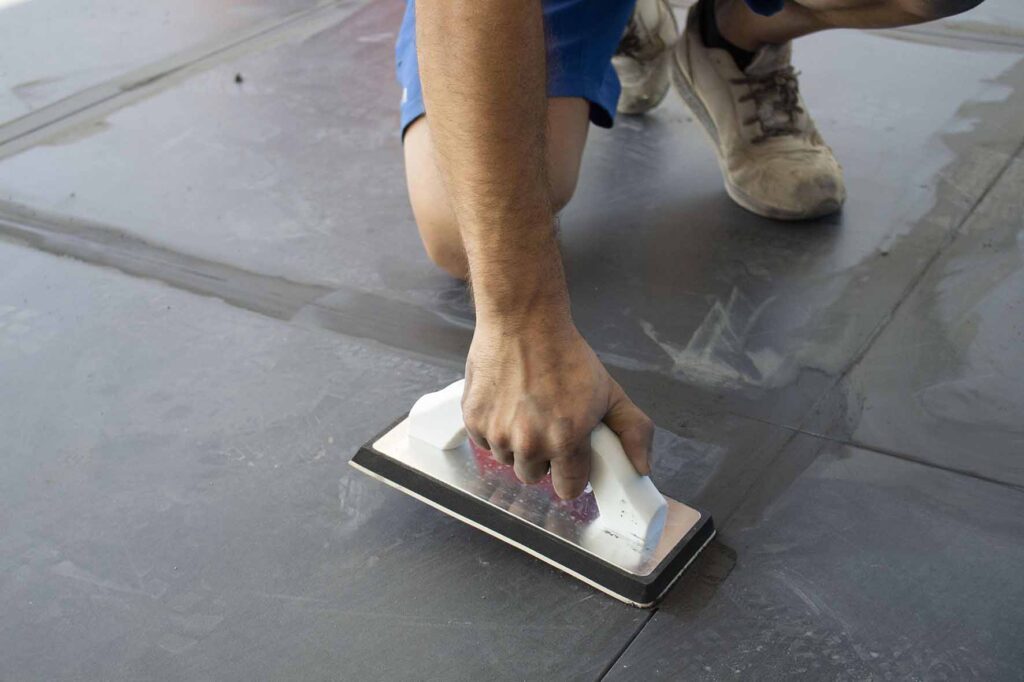
- For grout application techniques, hold the grout float at a 45-degree angle and press the grout into the tile joints. Work diagonally across the tiles to ensure even coverage. Once applied, use the grout float to remove excess grout at a 45-degree angle. Finally, clean the tiles with a damp grout sponge, making sure to rinse it frequently for a polished finish.
Preparing the Grout Mixture
- When preparing the grout mixture, ensure you achieve a smooth and uniform consistency by carefully following the manufacturer’s instructions for mixing. Start by pouring the recommended amount of grout powder into a clean mixing container. Add water gradually while stirring continuously to prevent clumps from forming. Pay close attention to the mixing ratio specified on the grout packaging to ensure the right balance of powder to water.
- Using the appropriate mixing techniques is crucial for achieving the desired grout consistency. Mix the grout using a margin trowel or a mixing paddle attached to a power drill. Blend the ingredients thoroughly until you reach a smooth, lump-free texture. Avoid overmixing, as this can introduce air bubbles into the grout mixture, affecting its performance.
- Consistency is key when preparing grout. The ideal consistency is similar to that of peanut butter – not too runny or too thick. Aim for a workable texture that allows you to spread the grout easily into the tile joints. Once mixed, let the grout sit according to the manufacturer’s instructions before applying it to the tiles.
Applying Grout to Tile Surface
- Achieving a smooth and uniform consistency in your grout mixture is essential before proceeding to apply it to the tile surface. Once your grout is well-prepared, it’s time to focus on the application process. Start by holding your grout float at a 45-degree angle and pressing the grout into the spaces between the tiles. Use a sweeping motion to ensure the grout fills the joints completely. After applying the grout, hold the float at a 90-degree angle and scrape off excess grout from the tile surface.
- When applying grout, it’s crucial to work in small sections to prevent it from drying too quickly. Keep a bucket of water and a sponge nearby to clean the tiles as you go. If you encounter any lumps or air bubbles in the grout, gently tap the tiles with a rubber mallet to settle the grout into place. Remember to follow the manufacturer’s instructions for drying times and sealing the grout after application.
- Experimenting with different grout color options can significantly impact the overall look of your tiled surface, so take your time to consider the design aspects before finalizing your choice. By mastering these grout application techniques and troubleshooting common issues, you can achieve a professional finish on your tiled surface.
Smoothing Grout Into Tile Joints
- For a smooth and professional finish on your tiled surface, ensure that you meticulously smooth the grout into the tile joints with deliberate care and precision. When smoothing grout into tile joints, it’s essential to use the appropriate grout application techniques. Start by holding the grout float at a 45-degree angle and pressing the grout into the joints. Work in a diagonal motion to ensure that the grout fills each joint evenly.
- As you smooth the grout, pay close attention to any air pockets or gaps that may appear. Use a gentle but firm hand to smooth out these imperfections. Once the grout is evenly spread, use a damp sponge to wipe off any excess grout from the tile surface. This final step will give your tiled surface a clean and polished look, emphasizing the finishing touches of your grouting job.
- In case you encounter any grout problems during the smoothing process, such as drying too quickly or cracking, refer to troubleshooting grout problems for effective solutions. Remember, proper maintenance tips after grouting will ensure the longevity and durability of your tiled surface.
Cleaning and Sealing the Grout
- To ensure the longevity and pristine appearance of your tiled surface, meticulously cleaning and sealing the grout is a crucial step in the maintenance process. Grout maintenance plays a significant role in preventing discoloration and keeping your tiled area looking fresh and clean over time. After allowing the grout to cure for the recommended period, begin by thoroughly cleaning the surface with a grout cleaner and a scrubbing brush. Ensure all residue is removed from the tile surface before proceeding.
- Once the grout is clean and dry, sealing it’s essential to protect it from moisture, dirt, and stains. Choose a high-quality grout sealer and carefully apply it to the grout lines using a small brush or applicator. Work in small sections to ensure even coverage and wipe off any excess sealer from the tile surface promptly.
- In case you make mistakes during the grout sealing process, such as accidentally sealing over a dirty surface, promptly address it by carefully removing the affected area of grout and reapplying the sealer correctly. Proper cleaning and sealing of grout won’t only enhance the appearance of your tiled surface but also prolong its lifespan.
Conclusion
Now that you’ve applied the tile grout, make sure to clean any excess grout off the tiles with a damp sponge. Allow the grout to dry completely before sealing it to protect against stains and water damage. Remember, proper grouting is essential for both the appearance and longevity of your tiled surface. With these steps, your tile project will have a professional finish that will last for years to come.